Best Doctor Builds, Perks & Add-ons in Dead by Daylight
The Doctor commands Carter's Spark with a 4.6 combat profile, 32m TR, and C-Tier lethality for Shock Therapy blasts that deny pallet drops and vaulting. Prioritize Overcharge in the Bloodweb, pairing it with Scourge Hook: Pain Resonance for generator regression and slowdown.
COMBAT TIER
C-Tier KillerKill Rate Rank #42
PICK RATE
1.68%Rank #27
KILL RATE
43.04%517 Games
SPEED & TERROR RADIUS
4.6 m/s (115%)32m
01 / POWER & BEST ADD-ONS
Doctor Power & Best Add-on Combinations
Carter's Spark
CARTER'S SPARK Successfully striking Survivors with The Doctor's special abilities, Shock Therapy or Static Blast , increases the Survivor's Madness , eventually afflicting them with the Madness status effect and triggering increasingly potent effects.
4.6 m/s (115%)32m Terror RadiusTall
Full power mechanics
CARTER'S SPARK
Successfully striking Survivors with The Doctor's special abilities, Shock Therapy or Static Blast , increases the Survivor's Madness , eventually afflicting them with the Madness status effect and triggering increasingly potent effects.
Madness I:
Causes Survivors to scream once, revealing their position to The Doctor . Slightly affects Skill Check placement and direction.
Madness II:
Causes Survivors to scream once and experience hallucinations in the form of an illusionary Doctor . Moderately affects Skill Check placement and direction.
Madness III:
Causes Survivors to scream intermittently and experience hallucinations in the form of an illusionary Doctor . Tremendously affects Skill Check placement and direction. The Survivor cannot heal, repair, sabotage, unlock, cleanse, or use items until they successfully Snap Out Of It . When a Survivor completes the Snap Out Of It action, they return to Madness I .
SPECIAL ABILITY: Shock Therapy
Press and hold the Power button to perform Shock Therapy , unleashing a ranged shock attack on the ground in front of you. Survivors struck by Shock Therapy gain increased Madness and any interactions they are performing are immediately interrupted. Shock Therapy immediately negates the Oblivious status effect.
SPECIAL ABILITY: Static Blast
Press and hold the Active Ability button to perform a Static Blast , causing all Survivors within The Doctor's Terror Radius to scream and gain increased Madness . Static Blast can only be activated when not on cooldown. Static Blast immediately negates the Oblivious status effect.
Project Awakening ECT procedure for disciplinary action, annotated by Doctor Herman Carter himself. The intolerably high voltage leaves the patient in a severe state of paranoia.
Decreases the detonation delay of Shock Therapy by 0.1 seconds .
Survivors with Madness suffer from the Affliction of Discipline :
Madness II : While in a chase, Survivors perceive an illusionary Red Stain and Terror Radius as though The Doctor were directly behind them. This effect persists for 6 seconds after the chase ends. Madness III : Illusionary Red Stain and Terror Radius are constantly active. The Doctor also sees the illusionary Red Stain .
DEFAULT META PAIR
very rare
"Order" - Carter's Notes
An experimental version of the ECT procedure, annotated by Doctor Herman Carter himself. The long, constant stimulus leaves the patient in a state of severe confusion.
Decreases Static Blast cooldown by 3 seconds .
Survivors with Madness suffer from the Affliction of Order :
Broken pallets may appear to be replaced with illusionary pallets that persist until approached.A new illusionary pallet is generated at the location of a random broken pallet every 20 seconds . The Doctor sees the auras of illusionary pallets.
ALTERNATE POWER OPTION
iridescent
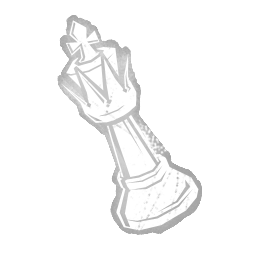
Iridescent King
A glass-like king chess piece molded from The Fog Itself. The Entity's trace reverberating within can break the most powerful minds.
Survivors with Madness status effect suffer from the following Afflictions: Calm, Discipline, Order, and Restraint .Causes Survivors to hear a distant illusionary Terror Radius . The effect is intermittent in Madness II and constant in Madness III .While in a chase, Survivors perceive an illusionary Red Stain and Terror Radiu s as though The Doctor were directly behind them. This effect persists for 6 seconds after the chase ends in Madness II and is constantly active in Madness III .Broken pallets may appear to be replaced with illusionary pallets that persist until approached. A new illusionary pallets is generated at the location of a random broken pallet every 20 seconds . Increases the duration of illusionary Doctor hallucinations by 6 seconds . The Doctor sees illusionary Red Stains as well as the auras of illusionary Doctors and illusionary pallets .
ALTERNATE POWER OPTION
iridescent
Iridescent Queen
A glass-like queen chess piece molded from The Fog itself. It can't be touched without receiving a considerable jolt of electricity.
All Survivors struck by Shock Therapy or Static Blast acquire a lingering Static Charge. The Static Charge remains with The Survivor(s) until discharged .Multiple Survivors struck by the same Shock Therapy or Static Blast that are within 4 meters of each other do not acquire a Static Charge.Any time a Survivor is within 4 meters of another Survivor carrying a Static Charge, the Survivor receives a shock identical to Shock Therapy and the Static Charge is discharged immediately.
Whenever you damage a Generator:
• Its regression speed will go from 85% to 130% over the next 30s.
• The next Survivor who starts repairing it gets a special Skill Check. If they miss it, they lose 2/3/4% more progress.
The Doctor's Carter's Spark anchors this meta setup. Core loadout: Scourge Hook: Pain Resonance and Pop Goes the Weasel establish early trial control, supported by Lethal Pursuer and Nowhere to Hide for chase and objective pressure. Use your power to force a predictable route, then convert the opening into a Basic Attack. Equip "Discipline" - Carter's Notes + "Order" - Carter's Notes to enhance power recovery and reach. Hook before rotating when your chosen slowdown requires a hook trigger.
Project Awakening ECT procedure for disciplinary action, annotated by Doctor Herman Carter himself. The intolerably high voltage leaves the patient in a severe state of paranoia.
Decreases the detonation delay of Shock Therapy by 0.1 seconds .
Survivors with Madness suffer from the Affliction of Discipline :
Madness II : While in a chase, Survivors perceive an illusionary Red Stain and Terror Radius as though The Doctor were directly behind them. This effect persists for 6 seconds after the chase ends. Madness III : Illusionary Red Stain and Terror Radius are constantly active. The Doctor also sees the illusionary Red Stain .
"Order" - Carter's NotesVERY RARE
An experimental version of the ECT procedure, annotated by Doctor Herman Carter himself. The long, constant stimulus leaves the patient in a state of severe confusion.
Decreases Static Blast cooldown by 3 seconds .
Survivors with Madness suffer from the Affliction of Order :
Broken pallets may appear to be replaced with illusionary pallets that persist until approached.A new illusionary pallet is generated at the location of a random broken pallet every 20 seconds . The Doctor sees the auras of illusionary pallets.
The Doctor's Carter's Spark anchors this starter setup. Core loadout: Overcharge and Monitor & Abuse establish early trial control, supported by Hex: No One Escapes Death and Sloppy Butcher for chase and objective pressure. Use your power to force a predictable route, then convert the opening into a Basic Attack. Equip "Discipline" - Class II + Moldy Electrode to enhance power recovery and reach. No extra DLC is required once you own The Doctor; basekit here means an equipped starter loadout.
Uses only this Killer's teachable and general Bloodweb perks. No extra character or DLC unlock is required once you own this Killer.
03 / POWER ADD-ONS
"Discipline" - Class IIUNCOMMON
Project Awakening ECT procedure for disciplinary action which uses a fixed dose at high voltage. Can cause a state of moderate paranoia in the patient.
Decreases the detonation delay of Shock Therapy by 0.06 seconds .
Survivors with Madness suffer from the Affliction of Discipline :
Madness II : While in a chase, Survivors perceive an illusionary Red Stain and Terror Radius as though The Doctor were directly behind them. This effect persists for 6 seconds after the chase ends. Madness III : Illusionary Red Stain and Terror Radius are constantly active. The Doctor also sees the illusionary Red Stain .
Moldy ElectrodeCOMMON
A moldy electrode which nevertheless conducts a weak electrical current.
Increases the range of Shock Therapy by 2 meters .
The Doctor's Carter's Spark anchors this signature setup. Core loadout: Overcharge and Scourge Hook: Pain Resonance establish early trial control, supported by Pop Goes the Weasel and Corrupt Intervention for chase and objective pressure. Use your power to force a predictable route, then convert the opening into a Basic Attack. Equip "Discipline" - Carter's Notes + "Order" - Carter's Notes to enhance power recovery and reach. Hook before rotating when your chosen slowdown requires a hook trigger.
Project Awakening ECT procedure for disciplinary action, annotated by Doctor Herman Carter himself. The intolerably high voltage leaves the patient in a severe state of paranoia.
Decreases the detonation delay of Shock Therapy by 0.1 seconds .
Survivors with Madness suffer from the Affliction of Discipline :
Madness II : While in a chase, Survivors perceive an illusionary Red Stain and Terror Radius as though The Doctor were directly behind them. This effect persists for 6 seconds after the chase ends. Madness III : Illusionary Red Stain and Terror Radius are constantly active. The Doctor also sees the illusionary Red Stain .
"Order" - Carter's NotesVERY RARE
An experimental version of the ECT procedure, annotated by Doctor Herman Carter himself. The long, constant stimulus leaves the patient in a state of severe confusion.
Decreases Static Blast cooldown by 3 seconds .
Survivors with Madness suffer from the Affliction of Order :
Broken pallets may appear to be replaced with illusionary pallets that persist until approached.A new illusionary pallet is generated at the location of a random broken pallet every 20 seconds . The Doctor sees the auras of illusionary pallets.
The Doctor's Carter's Spark anchors this specialist setup. Core loadout: Monitor & Abuse and Lethal Pursuer establish early trial control, supported by Nowhere to Hide and Bamboozle for chase and objective pressure. Use your power to force a predictable route, then convert the opening into a Basic Attack. Equip Iridescent King + Iridescent Queen to enhance power recovery and reach. Hook before rotating when your chosen slowdown requires a hook trigger.
A glass-like king chess piece molded from The Fog Itself. The Entity's trace reverberating within can break the most powerful minds.
Survivors with Madness status effect suffer from the following Afflictions: Calm, Discipline, Order, and Restraint .Causes Survivors to hear a distant illusionary Terror Radius . The effect is intermittent in Madness II and constant in Madness III .While in a chase, Survivors perceive an illusionary Red Stain and Terror Radiu s as though The Doctor were directly behind them. This effect persists for 6 seconds after the chase ends in Madness II and is constantly active in Madness III .Broken pallets may appear to be replaced with illusionary pallets that persist until approached. A new illusionary pallets is generated at the location of a random broken pallet every 20 seconds . Increases the duration of illusionary Doctor hallucinations by 6 seconds . The Doctor sees illusionary Red Stains as well as the auras of illusionary Doctors and illusionary pallets .
Iridescent QueenIRIDESCENT
A glass-like queen chess piece molded from The Fog itself. It can't be touched without receiving a considerable jolt of electricity.
All Survivors struck by Shock Therapy or Static Blast acquire a lingering Static Charge. The Static Charge remains with The Survivor(s) until discharged .Multiple Survivors struck by the same Shock Therapy or Static Blast that are within 4 meters of each other do not acquire a Static Charge.Any time a Survivor is within 4 meters of another Survivor carrying a Static Charge, the Survivor receives a shock identical to Shock Therapy and the Static Charge is discharged immediately.
The Doctor's Carter's Spark anchors this snowball setup. Core loadout: Lethal Pursuer and Nowhere to Hide establish early trial control, supported by Barbecue & Chili and Bamboozle for chase and objective pressure. Use your power to force a predictable route, then convert the opening into a Basic Attack. Equip "Discipline" - Carter's Notes + "Order" - Carter's Notes to enhance power recovery and reach. Hook before rotating when your chosen slowdown requires a hook trigger.
Project Awakening ECT procedure for disciplinary action, annotated by Doctor Herman Carter himself. The intolerably high voltage leaves the patient in a severe state of paranoia.
Decreases the detonation delay of Shock Therapy by 0.1 seconds .
Survivors with Madness suffer from the Affliction of Discipline :
Madness II : While in a chase, Survivors perceive an illusionary Red Stain and Terror Radius as though The Doctor were directly behind them. This effect persists for 6 seconds after the chase ends. Madness III : Illusionary Red Stain and Terror Radius are constantly active. The Doctor also sees the illusionary Red Stain .
"Order" - Carter's NotesVERY RARE
An experimental version of the ECT procedure, annotated by Doctor Herman Carter himself. The long, constant stimulus leaves the patient in a state of severe confusion.
Decreases Static Blast cooldown by 3 seconds .
Survivors with Madness suffer from the Affliction of Order :
Broken pallets may appear to be replaced with illusionary pallets that persist until approached.A new illusionary pallet is generated at the location of a random broken pallet every 20 seconds . The Doctor sees the auras of illusionary pallets.
The Doctor's Carter's Spark anchors this adept setup. Core loadout: Overcharge and Monitor & Abuse establish early trial control, supported by Overwhelming Presence and Scourge Hook: Pain Resonance for chase and objective pressure. Use your power to force a predictable route, then convert the opening into a Basic Attack. Equip "Discipline" - Carter's Notes + "Order" - Carter's Notes to enhance power recovery and reach. For the Adept achievement remove the fourth perk, then earn a Merciless Killer result with only the three unique teachables.
Project Awakening ECT procedure for disciplinary action, annotated by Doctor Herman Carter himself. The intolerably high voltage leaves the patient in a severe state of paranoia.
Decreases the detonation delay of Shock Therapy by 0.1 seconds .
Survivors with Madness suffer from the Affliction of Discipline :
Madness II : While in a chase, Survivors perceive an illusionary Red Stain and Terror Radius as though The Doctor were directly behind them. This effect persists for 6 seconds after the chase ends. Madness III : Illusionary Red Stain and Terror Radius are constantly active. The Doctor also sees the illusionary Red Stain .
"Order" - Carter's NotesVERY RARE
An experimental version of the ECT procedure, annotated by Doctor Herman Carter himself. The long, constant stimulus leaves the patient in a state of severe confusion.
Decreases Static Blast cooldown by 3 seconds .
Survivors with Madness suffer from the Affliction of Order :
Broken pallets may appear to be replaced with illusionary pallets that persist until approached.A new illusionary pallet is generated at the location of a random broken pallet every 20 seconds . The Doctor sees the auras of illusionary pallets.
Curated loadout · Patch 10.2.2b
Local snapshot: 20/11/2026, 17:05:20 UTC
Meta scores are composite ratings reflecting tactical synergy and tier viability derived from 28-day community match telemetry.Expand a build for tactics, free swaps and equipment.
04 / OFFICIAL KILLER LORE
The Doctor: Lore & Backstory
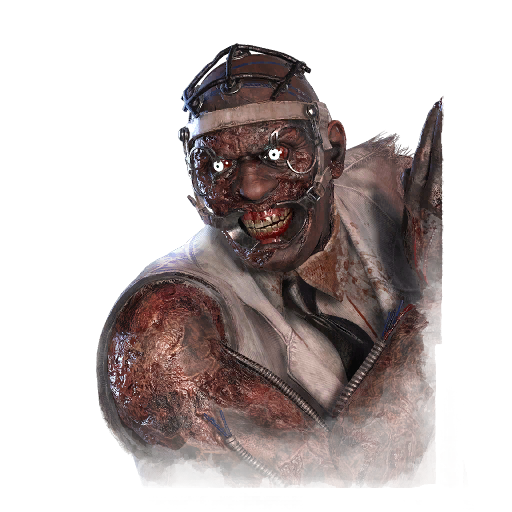
Showing exceptional aptitude in psychology, Herman was handpicked for special training in an advanced neuroscience program located in a secret black site facility in Illinois known as the Léry Memorial Institute, really a front for the CIA. This is where Herman met Dr. Otto Stamper where under his guidance, Herman began to use strange and ever increasingly vicious methods to extract information from prisoners sent to the institute, which was also a covert prison and re-education center for whoever was the USA’s current nemesis. His liberal use of violent electroshock therapy revealed dramatic results and several threats to national security were uncovered.
Over the years, Herman became known as The Doctor and no one ever questioned if he had even held a medical certificate or even what happened to the prisoners after they had given up their information. It was only after the Léry Memorial Institute went silent for a week that the true horror was finally discovered. The personnel, patients, and prisoners were all found dead with all types of head trauma. All personnel and prisoners' bodies were accounted for, including Dr. Otto Stamper, but no sign of Herman “The Doctor” Carter.
The Doctor FAQ
What is the best Doctor build in DBD?+
Start with Scourge Hook: Pain Resonance, Pop Goes the Weasel, Lethal Pursuer, Nowhere to Hide. Equip "Discipline" - Carter's Notes and "Order" - Carter's Notes for Carter's Spark. This is a high-MMR meta recommendation.
What is a free build for The Doctor?+
Once you own The Doctor, equip Overcharge, Monitor & Abuse, Hex: No One Escapes Death, Sloppy Butcher. This uses only owned teachables and free General Killer Perks. Pair "Discipline" - Class II with Moldy Electrode for a Common/Uncommon starter.
How fast is The Doctor, and what is their Terror Radius?+
The synced movement speed is 4.6 m/s (115%), with a Terror Radius of 32m. Power states and add-ons can change these values; read the power and add-on effects above.
Which perks belong to The Doctor?+
Overcharge, Monitor & Abuse, Overwhelming Presence are this Killer's three teachable perks. Prioritize Overcharge for the first Bloodweb unlock.
What is The Doctor's Pick Rate and Kill Rate in Dead by Daylight?+
In our 28-day community match telemetry across 517 recorded trials, The Doctor holds a Pick Rate of 1.68% (Rank #27) and a Kill Rate of 43.04% (Rank #42), placing them in C-Tier.
Do Basic Attack perks work with The Doctor's power?+
Basic Attack effects require an actual Basic Attack hit or down. Power damage, traps, guards and other indirect effects do not automatically satisfy that condition. Check each perk's activation text.
 very rare