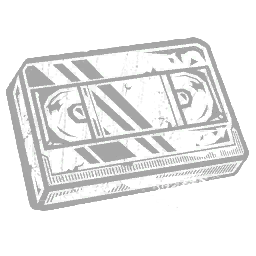
 iridescent
Iridescent Videotape
The original tape containing Sadako’s curse. Projection does not turn off TVs, and does not apply Condemned . Increases the time it takes for a TV to turn on after being turned off by Survivors by 20%

The Onryō commands Deluge of Fear with a 4.6 combat profile, 24m TR, and S-Tier lethality to project through televisions and condemn unvigilant Survivors. Prioritize Call of Brine in the Bloodweb, pairing it with Scourge Hook: Pain Resonance for generator regression and slowdown.
iridescentThe original tape containing Sadako’s curse. Projection does not turn off TVs, and does not apply Condemned . Increases the time it takes for a TV to turn on after being turned off by Survivors by 20%
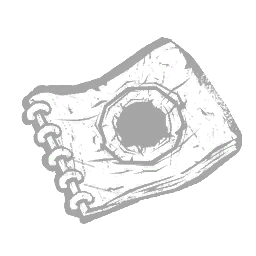 rare
A drawing of the view from inside the well, as drawn by a young Yoichi. Helping those cursed by the tape can only bring misfortune. When hooking a Survivor carrying a tape, other Survivors gain 1 Condemned stack.
 very rare
After watching the video, victims receive a phone call. They are frozen in fear as they realize they have seven days to live. Manifestation afflicts Survivors within 7 meters with a 3% Hindered status effect for 3 seconds . Hindered reduces survivor movement speed.
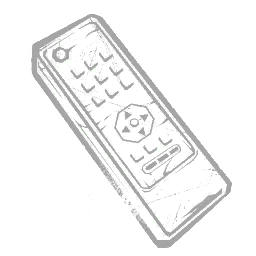 iridescent
A remote for the VCR at the cabin. It allows Sadako to focus on those enemies at a distance. After using Projection , the Auras of Survivors who are within 12 meters of a powered TV are revealed to you for 7 seconds .

When the trial starts, 4 random Hooks become Scourge Hooks.
Whenever a Survivor is unhooked from a Scourge Hook, you see the Auras of other Survivors for 5/6/7s.
Whenever you damage a Generator, it regresses 30/40/50% faster for 90s.
For that time, whenever a Survivor hits a good basic Skill Check while repairing that Generator, you are alerted.
The first time each Generator has 90% progress: Survivors repairing it get special Skill Checks. If they miss one of these or stop repairing, that Generator is blocked for 16/18/20s.
These power-compatible loadouts are curated high-MMR meta builds, paired with 28-day community match telemetry.
| TIER | BUILD / ARCHETYPE | PERK LOADOUT | Details | |||
|---|---|---|---|---|---|---|
| S |     | 0/ 4Bloodweb pool | 4teachable owners | |||
Power-focused recommendationThe Onryō's Deluge of Fear anchors this meta setup. Core loadout: Scourge Hook: Pain Resonance and Pop Goes the Weasel establish early trial control, supported by Lethal Pursuer and Nowhere to Hide for chase and objective pressure. Use your mobility to act on the next information trigger rather than patrolling empty generators. Equip Iridescent Videotape + Ring Drawing to enhance power recovery and reach. Hook before rotating when your chosen slowdown requires a hook trigger. Recommended: The Onryō Scourge Hook: Pain Resonance → Hex: No One Escapes DeathWhen all Generators are completed, a Dull Totem ignites: Survivors gain Exposed.  Pop Goes the Weasel → Sloppy ButcherWhenever you damage a Survivor with a basic-attack: They gain Hemorrhage for 70/80/90 s.  Lethal Pursuer → DeerstalkerEvery 40/35/30 s, the Survivor with the least time in chase sees your Aura for 4 s.  Nowhere to Hide → Hex: Thrill of the HuntThe first time you hook a Survivor, a Dull Totem ignites. Iridescent VideotapeIRIDESCENTThe original tape containing Sadako’s curse. Projection does not turn off TVs, and does not apply Condemned . Increases the time it takes for a TV to turn on after being turned off by Survivors by 20% Ring DrawingRAREA drawing of the view from inside the well, as drawn by a young Yoichi. Helping those cursed by the tape can only bring misfortune. When hooking a Survivor carrying a tape, other Survivors gain 1 Condemned stack. Curated loadout · Patch 10.2.2b Local snapshot: 20/11/2026, 17:05:20 UTC | ||||||
| A | | 2/ 4Bloodweb pool | 1teachable owners | |||
Zero-DLC Starter (Onryō + Free General Pool)The Onryō's Deluge of Fear anchors this starter setup. Core loadout: Call of Brine and Scourge Hook: Floods of Rage establish early trial control, supported by Hex: No One Escapes Death and Sloppy Butcher for chase and objective pressure. Use your mobility to act on the next information trigger rather than patrolling empty generators. Equip Old Newspaper + Reiko's Watch to enhance power recovery and reach. No extra DLC is required once you own The Onryō; basekit here means an equipped starter loadout. Recommended: The OnryōUses only this Killer's teachable and general Bloodweb perks. No extra character or DLC unlock is required once you own this Killer.   Old NewspaperCOMMONIt tells of a local woman who predicted a volcanic eruption, evidence used to initially find Sadako. Increases the Manifestation invisibility duration by 33% . Reiko's WatchUNCOMMONThe watch that Reiko left her son Yoichi. A distracting and constant reminder of one’s impending doom. Increases the invisibility duration while Demanifested by 25% . Curated loadout · Patch 10.2.2b Local snapshot: 20/11/2026, 17:05:20 UTC | ||||||
| S |  | 0/ 4Bloodweb pool | 4teachable owners | |||
Call of Brine Signature LoadoutThe Onryō's Deluge of Fear anchors this signature setup. Core loadout: Call of Brine and Scourge Hook: Pain Resonance establish early trial control, supported by Pop Goes the Weasel and Corrupt Intervention for chase and objective pressure. Use your mobility to act on the next information trigger rather than patrolling empty generators. Equip Iridescent Videotape + Ring Drawing to enhance power recovery and reach. Hook before rotating when your chosen slowdown requires a hook trigger. Recommended: The OnryōCall of Brine → Hex: No One Escapes DeathWhen all Generators are completed, a Dull Totem ignites: Survivors gain Exposed. Scourge Hook: Pain Resonance → Sloppy ButcherWhenever you damage a Survivor with a basic-attack: They gain Hemorrhage for 70/80/90 s. Pop Goes the Weasel → DeerstalkerEvery 40/35/30 s, the Survivor with the least time in chase sees your Aura for 4 s. Corrupt Intervention → Hex: Thrill of the HuntThe first time you hook a Survivor, a Dull Totem ignites. Iridescent VideotapeIRIDESCENTThe original tape containing Sadako’s curse. Projection does not turn off TVs, and does not apply Condemned . Increases the time it takes for a TV to turn on after being turned off by Survivors by 20% Ring DrawingRAREA drawing of the view from inside the well, as drawn by a young Yoichi. Helping those cursed by the tape can only bring misfortune. When hooking a Survivor carrying a tape, other Survivors gain 1 Condemned stack. Curated loadout · Patch 10.2.2b Local snapshot: 20/11/2026, 17:05:20 UTC | ||||||
| S |  | 0/ 4Bloodweb pool | 4teachable owners | |||
Scourge Hook: Floods of Rage SpecialistThe Onryō's Deluge of Fear anchors this specialist setup. Core loadout: Scourge Hook: Floods of Rage and Lethal Pursuer establish early trial control, supported by Nowhere to Hide and Bamboozle for chase and objective pressure. Use your mobility to act on the next information trigger rather than patrolling empty generators. Equip Telephone + Remote Control to enhance power recovery and reach. Hook before rotating when your chosen slowdown requires a hook trigger. Recommended: The OnryōScourge Hook: Floods of Rage → Hex: No One Escapes DeathWhen all Generators are completed, a Dull Totem ignites: Survivors gain Exposed. Lethal Pursuer → Sloppy ButcherWhenever you damage a Survivor with a basic-attack: They gain Hemorrhage for 70/80/90 s. Nowhere to Hide → DeerstalkerEvery 40/35/30 s, the Survivor with the least time in chase sees your Aura for 4 s. Bamboozle → Hex: Thrill of the HuntThe first time you hook a Survivor, a Dull Totem ignites. TelephoneVERY RAREAfter watching the video, victims receive a phone call. They are frozen in fear as they realize they have seven days to live. Manifestation afflicts Survivors within 7 meters with a 3% Hindered status effect for 3 seconds . Hindered reduces survivor movement speed. Remote ControlIRIDESCENTA remote for the VCR at the cabin. It allows Sadako to focus on those enemies at a distance. After using Projection , the Auras of Survivors who are within 12 meters of a powered TV are revealed to you for 7 seconds . Curated loadout · Patch 10.2.2b Local snapshot: 20/11/2026, 17:05:20 UTC | ||||||
| S |  | 0/ 4Bloodweb pool | 4teachable owners | |||
Aggressive Aura / Chase SnowballThe Onryō's Deluge of Fear anchors this snowball setup. Core loadout: Lethal Pursuer and Nowhere to Hide establish early trial control, supported by Barbecue & Chili and Bamboozle for chase and objective pressure. Use your mobility to act on the next information trigger rather than patrolling empty generators. Equip Iridescent Videotape + Ring Drawing to enhance power recovery and reach. Hook before rotating when your chosen slowdown requires a hook trigger. Recommended: The OnryōLethal Pursuer → Hex: No One Escapes DeathWhen all Generators are completed, a Dull Totem ignites: Survivors gain Exposed. Nowhere to Hide → Sloppy ButcherWhenever you damage a Survivor with a basic-attack: They gain Hemorrhage for 70/80/90 s. Barbecue & Chili → DeerstalkerEvery 40/35/30 s, the Survivor with the least time in chase sees your Aura for 4 s. Bamboozle → Hex: Thrill of the HuntThe first time you hook a Survivor, a Dull Totem ignites. Iridescent VideotapeIRIDESCENTThe original tape containing Sadako’s curse. Projection does not turn off TVs, and does not apply Condemned . Increases the time it takes for a TV to turn on after being turned off by Survivors by 20% Ring DrawingRAREA drawing of the view from inside the well, as drawn by a young Yoichi. Helping those cursed by the tape can only bring misfortune. When hooking a Survivor carrying a tape, other Survivors gain 1 Condemned stack. Curated loadout · Patch 10.2.2b Local snapshot: 20/11/2026, 17:05:20 UTC | ||||||
| A | | 0/ 4Bloodweb pool | 2teachable owners | |||
Adept Onryō + 4th Slot FlexThe Onryō's Deluge of Fear anchors this adept setup. Core loadout: Call of Brine and Scourge Hook: Floods of Rage establish early trial control, supported by Merciless Storm and Scourge Hook: Pain Resonance for chase and objective pressure. Use your mobility to act on the next information trigger rather than patrolling empty generators. Equip Iridescent Videotape + Ring Drawing to enhance power recovery and reach. For the Adept achievement remove the fourth perk, then earn a Merciless Killer result with only the three unique teachables. Recommended: The OnryōCall of Brine → Hex: No One Escapes DeathWhen all Generators are completed, a Dull Totem ignites: Survivors gain Exposed. Scourge Hook: Floods of Rage → Sloppy ButcherWhenever you damage a Survivor with a basic-attack: They gain Hemorrhage for 70/80/90 s. Merciless Storm → DeerstalkerEvery 40/35/30 s, the Survivor with the least time in chase sees your Aura for 4 s. Scourge Hook: Pain Resonance → Hex: Thrill of the HuntThe first time you hook a Survivor, a Dull Totem ignites. Iridescent VideotapeIRIDESCENTThe original tape containing Sadako’s curse. Projection does not turn off TVs, and does not apply Condemned . Increases the time it takes for a TV to turn on after being turned off by Survivors by 20% Ring DrawingRAREA drawing of the view from inside the well, as drawn by a young Yoichi. Helping those cursed by the tape can only bring misfortune. When hooking a Survivor carrying a tape, other Survivors gain 1 Condemned stack. Curated loadout · Patch 10.2.2b Local snapshot: 20/11/2026, 17:05:20 UTC | ||||||
A powerful and lethal onryō, Sadako Yamamura was the daughter of a famed seer from Izu Oshima, Japan.
Her mother left many questions unanswered. In her hometown, sailors disliked the way her mother would spend days on the beach, her eyes fixed on the foaming waves of the sea. Some said, frolic in brine, goblins be thine--if you keep playing in the water, the monster will come for you.
Nine months later, Sadako was born. As a child, her immense powers seemed impossible to control and flared in anger. This became apparent when she was unable to control her rage during a public demonstration of her mother’s powers. When a journalist called her mother a fraud, Sadako’s powers surged, and the journalist collapsed on the floor, struck dead.
Then everything went wrong. Her mother passed away and shortly after Sadako was lured to an old, crumbling well. As she leaned over the rim, a long shadow fell over her. She turned and a sudden jolt of pain hit her over the head, cracking it open. Her vision dimmed and her mind swirled into unconsciousness. She felt two hands pushing her over the rim.
Pain exploded in her skull as she hit the cold ground. A grinding noise came from above and the well darkened, all light obscured like a midday eclipse.
Every inch of her body screamed in pain. Looking up, she saw the only way out. She dug her nails into the muddy ground and slowly crawled toward the cobbled wall. She gripped the stones to climb but had neither hold nor strength. Each time she clawed up a few inches, her nails slid against the wet wall and she slipped down. Her fingers gushed with blood as the coarse cobblestone tore off her nails and lacerated the flesh underneath. And yet she tried, again and again.
Decades later, the meadow became a resort, and a log cabin was built above the well. When a visitor rented the cabin, Sadako found an opportunity for revenge. She summoned all her nensha power and projected a terrible curse on a videotape that killed its viewer after seven days.
Her wrath was like the tides of a stormy sea, violent and unforgiving. As she plunged into a fury, a dark fog coiled at her feet. The sound of crashing waves echoed through the old stone well.
Suddenly, a tidal surge came crashing down on the cabin's walls, wrecking its logs into a torrent of mud and filth. The black current flooded the well underneath and swallowed Sadako at once.
When she opened her eyes, she stood on a desolate beach facing a vast, stormy ocean. A thick, black fog caressed the water's surface.
Sadako walked into a coming wave and slowly disappeared into the opaque fog.
Start with Scourge Hook: Pain Resonance, Pop Goes the Weasel, Lethal Pursuer, Nowhere to Hide. Equip Iridescent Videotape and Ring Drawing for Deluge of Fear. This is a high-MMR meta recommendation.
Once you own The Onryō, equip Call of Brine, Scourge Hook: Floods of Rage, Hex: No One Escapes Death, Sloppy Butcher. This uses only owned teachables and free General Killer Perks. Pair Old Newspaper with Reiko's Watch for a Common/Uncommon starter.
The synced movement speed is 4.6 m/s (115%), with a Terror Radius of 24m. Power states and add-ons can change these values; read the power and add-on effects above.
Scourge Hook: Floods of Rage, Call of Brine, Merciless Storm are this Killer's three teachable perks. Prioritize Call of Brine for the first Bloodweb unlock.
In our 28-day community match telemetry across 432 recorded trials, The Onryō holds a Pick Rate of 1.41% (Rank #32) and a Kill Rate of 51.91% (Rank #5), placing them in S-Tier.
Basic Attack effects require an actual Basic Attack hit or down. Power damage, traps, guards and other indirect effects do not automatically satisfy that condition. Check each perk's activation text.