 rare
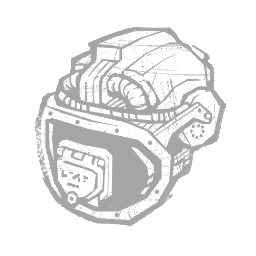
Emergency Helmet
An extra helmet on the bridge, for use in emergencies only. Increases resistance to staggering from Turrets by 15% .

The Xenomorph commands Hidden Pursuit with a 4.6 combat profile, 32m TR, and C-Tier lethality to navigate underground tunnels and strike with a lethal tail. Prioritize Rapid Brutality in the Bloodweb, pairing it with Scourge Hook: Pain Resonance for generator regression and slowdown.
rareAn extra helmet on the bridge, for use in emergencies only. Increases resistance to staggering from Turrets by 15% .
 very rare
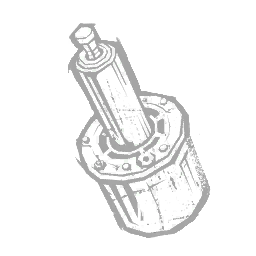
They needed to be removed to start, and replaced to end, the self-destruct sequence. Just seeing them evokes a sense of urgency. While in Crawler Mode , you basic-vault Windows 30% faster.
 iridescent
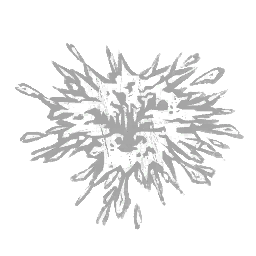
When damaged, the Xenomorph’s unique physiology made it deadlier than ever. While exiting a tunnel in Crawler Mode , any Survivor who stuns you with a pallet in the next 20 seconds takes damage. If that Survivor is already injured, they suffer from Deep Wound . Deep Wound will put a Survivor in the dying state unless it is mended before the timer runs out.
 rare
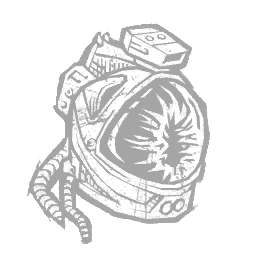
A thin layer of glass was the difference between a minor inconvenience and the tragic destruction of the Nostromo’s crew. Survivors hit with a Tail Attack are Mangled for 70 seconds . Mangled increases time required to heal by 25% and lasts for a set duration or until fully healed.
Whenever you search a Locker, Survivors within 40m: • Gain Blindness for 30s. • Scream.
Cooldown: 55/50/45s.
Whenever you damage a Survivor with a basic-attack, you gain 5% Haste for 8/9/10s.
While chasing a Survivor, you cannot gain Bloodlust.
Whenever you hook a Survivor, the farthest injured Survivor: • Gains Oblivious for 40/50/60s. • You see their Aura for 8s.
These power-compatible loadouts are curated high-MMR meta builds, paired with 28-day community match telemetry.
| TIER | BUILD / ARCHETYPE | PERK LOADOUT | Details | |||
|---|---|---|---|---|---|---|
| S |     | 0/ 4Bloodweb pool | 4teachable owners | |||
Power-focused recommendationThe Xenomorph's Hidden Pursuit anchors this meta setup. Core loadout: Scourge Hook: Pain Resonance and Pop Goes the Weasel establish early trial control, supported by Lethal Pursuer and Nowhere to Hide for chase and objective pressure. Focus on power hits; Basic Attack-only triggers do not activate from Special Attacks. Equip Emergency Helmet + Self-Destruct Bolt to enhance power recovery and reach. Hook before rotating when your chosen slowdown requires a hook trigger. Recommended: The Xenomorph Scourge Hook: Pain Resonance → Hex: No One Escapes DeathWhen all Generators are completed, a Dull Totem ignites: Survivors gain Exposed.  Pop Goes the Weasel → DeerstalkerEvery 40/35/30 s, the Survivor with the least time in chase sees your Aura for 4 s.  Lethal Pursuer → Hex: Thrill of the HuntThe first time you hook a Survivor, a Dull Totem ignites.  Nowhere to Hide → Spies from the ShadowsWhenever a Survivor scares a Crow within 36/38/40 m of you, you are alerted. Emergency HelmetRAREAn extra helmet on the bridge, for use in emergencies only. Increases resistance to staggering from Turrets by 15% . Self-Destruct BoltVERY RAREThey needed to be removed to start, and replaced to end, the self-destruct sequence. Just seeing them evokes a sense of urgency. While in Crawler Mode , you basic-vault Windows 30% faster. Curated loadout · Patch 10.2.2b Local snapshot: 20/11/2026, 17:05:20 UTC | ||||||
| A | | 2/ 4Bloodweb pool | 1teachable owners | |||
Zero-DLC Starter (Xenomorph + Free General Pool)The Xenomorph's Hidden Pursuit anchors this starter setup. Core loadout: Ultimate Weapon and Alien Instinct establish early trial control, supported by Hex: No One Escapes Death and Deerstalker for chase and objective pressure. Focus on power hits; Basic Attack-only triggers do not activate from Special Attacks. Equip Lambert’s Star Map + Brett’s Cap to enhance power recovery and reach. No extra DLC is required once you own The Xenomorph; basekit here means an equipped starter loadout. Recommended: The XenomorphUses only this Killer's teachable and general Bloodweb perks. No extra character or DLC unlock is required once you own this Killer.   Lambert’s Star MapUNCOMMONVital for interstellar travel, but not as useful on a smaller scale. Decreases the flame distance of Turrets by 2 meters . Brett’s CapUNCOMMONThis Nostromo ballcap was fashionable, but severely limited his vertical field of vision. Destroying a Turret causes all Survivors within 16 meters to suffer from Blindness for 25 seconds . Blindness prevents Survivors from seeing auras. Curated loadout · Patch 10.2.2b Local snapshot: 20/11/2026, 17:05:20 UTC | ||||||
| S |  | 0/ 4Bloodweb pool | 4teachable owners | |||
Rapid Brutality Signature LoadoutThe Xenomorph's Hidden Pursuit anchors this signature setup. Core loadout: Rapid Brutality and Scourge Hook: Pain Resonance establish early trial control, supported by Pop Goes the Weasel and Corrupt Intervention for chase and objective pressure. Focus on power hits; Basic Attack-only triggers do not activate from Special Attacks. Equip Emergency Helmet + Self-Destruct Bolt to enhance power recovery and reach. Hook before rotating when your chosen slowdown requires a hook trigger. Recommended: The XenomorphRapid Brutality → Hex: No One Escapes DeathWhen all Generators are completed, a Dull Totem ignites: Survivors gain Exposed. Scourge Hook: Pain Resonance → DeerstalkerEvery 40/35/30 s, the Survivor with the least time in chase sees your Aura for 4 s. Pop Goes the Weasel → Hex: Thrill of the HuntThe first time you hook a Survivor, a Dull Totem ignites. Corrupt Intervention → Spies from the ShadowsWhenever a Survivor scares a Crow within 36/38/40 m of you, you are alerted. Emergency HelmetRAREAn extra helmet on the bridge, for use in emergencies only. Increases resistance to staggering from Turrets by 15% . Self-Destruct BoltVERY RAREThey needed to be removed to start, and replaced to end, the self-destruct sequence. Just seeing them evokes a sense of urgency. While in Crawler Mode , you basic-vault Windows 30% faster. Curated loadout · Patch 10.2.2b Local snapshot: 20/11/2026, 17:05:20 UTC | ||||||
| A |  | 0/ 4Bloodweb pool | 4teachable owners | |||
Ultimate Weapon SpecialistThe Xenomorph's Hidden Pursuit anchors this specialist setup. Core loadout: Ultimate Weapon and Lethal Pursuer establish early trial control, supported by Nowhere to Hide and Bamboozle for chase and objective pressure. Focus on power hits; Basic Attack-only triggers do not activate from Special Attacks. Equip Acidic Blood + Kane’s Helmet to enhance power recovery and reach. Hook before rotating when your chosen slowdown requires a hook trigger. Recommended: The XenomorphUltimate Weapon → Hex: No One Escapes DeathWhen all Generators are completed, a Dull Totem ignites: Survivors gain Exposed. Lethal Pursuer → DeerstalkerEvery 40/35/30 s, the Survivor with the least time in chase sees your Aura for 4 s. Nowhere to Hide → Hex: Thrill of the HuntThe first time you hook a Survivor, a Dull Totem ignites. Bamboozle → Spies from the ShadowsWhenever a Survivor scares a Crow within 36/38/40 m of you, you are alerted. Acidic BloodIRIDESCENTWhen damaged, the Xenomorph’s unique physiology made it deadlier than ever. While exiting a tunnel in Crawler Mode , any Survivor who stuns you with a pallet in the next 20 seconds takes damage. If that Survivor is already injured, they suffer from Deep Wound . Deep Wound will put a Survivor in the dying state unless it is mended before the timer runs out. Kane’s HelmetRAREA thin layer of glass was the difference between a minor inconvenience and the tragic destruction of the Nostromo’s crew. Survivors hit with a Tail Attack are Mangled for 70 seconds . Mangled increases time required to heal by 25% and lasts for a set duration or until fully healed. Curated loadout · Patch 10.2.2b Local snapshot: 20/11/2026, 17:05:20 UTC | ||||||
| S |  | 0/ 4Bloodweb pool | 4teachable owners | |||
Aggressive Aura / Chase SnowballThe Xenomorph's Hidden Pursuit anchors this snowball setup. Core loadout: Lethal Pursuer and Nowhere to Hide establish early trial control, supported by Barbecue & Chili and Bamboozle for chase and objective pressure. Focus on power hits; Basic Attack-only triggers do not activate from Special Attacks. Equip Emergency Helmet + Self-Destruct Bolt to enhance power recovery and reach. Hook before rotating when your chosen slowdown requires a hook trigger. Recommended: The XenomorphLethal Pursuer → Hex: No One Escapes DeathWhen all Generators are completed, a Dull Totem ignites: Survivors gain Exposed. Nowhere to Hide → DeerstalkerEvery 40/35/30 s, the Survivor with the least time in chase sees your Aura for 4 s. Barbecue & Chili → Hex: Thrill of the HuntThe first time you hook a Survivor, a Dull Totem ignites. Bamboozle → Spies from the ShadowsWhenever a Survivor scares a Crow within 36/38/40 m of you, you are alerted. Emergency HelmetRAREAn extra helmet on the bridge, for use in emergencies only. Increases resistance to staggering from Turrets by 15% . Self-Destruct BoltVERY RAREThey needed to be removed to start, and replaced to end, the self-destruct sequence. Just seeing them evokes a sense of urgency. While in Crawler Mode , you basic-vault Windows 30% faster. Curated loadout · Patch 10.2.2b Local snapshot: 20/11/2026, 17:05:20 UTC | ||||||
| A | | 0/ 4Bloodweb pool | 2teachable owners | |||
Adept Xenomorph + 4th Slot FlexThe Xenomorph's Hidden Pursuit anchors this adept setup. Core loadout: Rapid Brutality and Ultimate Weapon establish early trial control, supported by Alien Instinct and Scourge Hook: Pain Resonance for chase and objective pressure. Focus on power hits; Basic Attack-only triggers do not activate from Special Attacks. Equip Emergency Helmet + Self-Destruct Bolt to enhance power recovery and reach. For the Adept achievement remove the fourth perk, then earn a Merciless Killer result with only the three unique teachables. Recommended: The XenomorphRapid Brutality → Hex: No One Escapes DeathWhen all Generators are completed, a Dull Totem ignites: Survivors gain Exposed. Ultimate Weapon → DeerstalkerEvery 40/35/30 s, the Survivor with the least time in chase sees your Aura for 4 s. Alien Instinct → Hex: Thrill of the HuntThe first time you hook a Survivor, a Dull Totem ignites. Scourge Hook: Pain Resonance → Spies from the ShadowsWhenever a Survivor scares a Crow within 36/38/40 m of you, you are alerted. Emergency HelmetRAREAn extra helmet on the bridge, for use in emergencies only. Increases resistance to staggering from Turrets by 15% . Self-Destruct BoltVERY RAREThey needed to be removed to start, and replaced to end, the self-destruct sequence. Just seeing them evokes a sense of urgency. While in Crawler Mode , you basic-vault Windows 30% faster. Curated loadout · Patch 10.2.2b Local snapshot: 20/11/2026, 17:05:20 UTC | ||||||
A perfect organism, born of violence, designed to kill.
The Xenomorph emerged from the chest cavity of a host named Kane and sought cover in the shadows of the Nostromo. As it shed its skin, The Xenomorph came to understand its environment. Using the ship’s air ducts, it killed its prey one by one, until only the human Ripley remained.
Desperate for survival, Ripley destroyed the Nostromo and sought refuge in an escape vessel. But The Xenomorph’s instincts gave it the edge. As the escape vessel floated through space, the Xenomorph lay in wait, watching its prey.
Just as it went in for the kill, the vessel’s airlock opened and The Xenomorph was ejected into the cold vacuum of space.
All was lost. The Xenomorph was close to death. And then, in an instant, it disappeared in a cloud of black fog.
Start with Scourge Hook: Pain Resonance, Pop Goes the Weasel, Lethal Pursuer, Nowhere to Hide. Equip Emergency Helmet and Self-Destruct Bolt for Hidden Pursuit. This is a high-MMR meta recommendation.
Once you own The Xenomorph, equip Ultimate Weapon, Alien Instinct, Hex: No One Escapes Death, Deerstalker. This uses only owned teachables and free General Killer Perks. Pair Lambert’s Star Map with Brett’s Cap for a Common/Uncommon starter.
The synced movement speed is 4.6 m/s (115%), with a Terror Radius of 32m. Power states and add-ons can change these values; read the power and add-on effects above.
Ultimate Weapon, Rapid Brutality, Alien Instinct are this Killer's three teachable perks. Prioritize Rapid Brutality for the first Bloodweb unlock.
In our 28-day community match telemetry across 418 recorded trials, The Xenomorph holds a Pick Rate of 1.36% (Rank #33) and a Kill Rate of 44.32% (Rank #37), placing them in C-Tier.
Basic Attack-only effects do not trigger from Special Attack downs or hits. The primary meta slots here use power-compatible slowdown and information; owned-perk challenge variants retain their exact in-game conditions.